Wednesday, July 23, 2008

"Splendid" Muffins


I love a good muffin--a fluffy, vanilla-flavored concoction just filled to the brim with blueberries, strawberries, chocolate chips, whatever strikes your fancy. Sometimes, though, in the name of healthy living, we must cut back on the sugar. I know, I know, I'm a baker, I'm not supposed to be anti-calories, and I'm not... but an effort to reduce the calories in an old favorite can never hurt.

Enter Splenda. I've always been a fan of Splenda because it's nice and sweet and because it doesn't have an unpleasant aftertaste. When I was in the store a couple of days ago, I noticed a bag of Splenda "Granular" on the shelf and decided to buy a small bag and give it a try. Although it is very, very different in texture and density to sugar (it looks a bit like snow), it measures cup for cup in recipes. Muffins and quick breads are especially noted on the bag, so I figured that there would be no better way to test Splenda Granular than with a nice blueberry muffin.

I used my regular muffin recipe--after I put the muffins the oven, I noticed a blueberry muffin recipe on the back of the bag, haha!--adding a bit of baking soda (probably unnecessary) and a touch of honey (to help browning). When the muffins came out of the oven, their tops were craggy, almost sconelike, but the interior was very, very nice. Given a sugar-laden muffin, I would not have been able to tell the difference, and I could pronounce my Splenda experiment a success.

Even if you don't have Splenda on hand, this recipe is a great basic muffin, but I would especially recommend it to be made with Splenda if you're watching calories. One muffin here has at most 175 calories, according to my calculations. I'm not one for healthy baking, but this was a nice change of pace!

Splendid Blueberry Muffins
Makes 12.

280 grams (2 cups) all-purpose flour
2 teaspoons baking powder
1/2 teaspoon salt
3/4 cup Splenda Granular sugar substitute (or granulated white sugar)
1/3 cup butter, melted
2 eggs
1/4 cup honey (omit if using sugar)
1/2 cup milk (I used skim)
1 cup blueberries

** Preheat oven to 350 degrees F. **

1. In medium bowl, combine flour, baking powder, and salt. Stir in blueberries, and set aside.
2. In large bowl, whisk together Splenda (or sugar), butter, eggs, and honey.
3. Whisk in milk until smooth.
4. Gently add dry ingredients to wet ingredients, and mix until just combined.
5. Divide batter among muffin cups and bake for 15 to 25 minutes, or until a toothpick inserted in center comes out with moist crumbs attached.
6. Let cool completely on wire rack before serving.

Sniffing Around

Peabody, of Culinary Concoctions by Peabody, recently posted a delicious-looking recipe for Brown Sugar Pound Cake. The mouth-watering pictures are enough to make me try a Martha Stewart recipe for the first time. And that's an accomplishment, for sure.

One of my very favorite foods is peanut butter--not any of that natural stuff, either, but good ol' creamy Jif. You know, the processed stuff. But I think I would enjoy Peanut Butter Crumble Cake (courtesy of Baking Bites with any brand of peanut butter, and cheers to Nicole for introducing yet another recipe to my test file!

I think oatmeal is the forgotten flavor of cookie, yet a nice, soft, spicy oatmeal cookie is one of the most satisfying experiences. Marilyn of Simmer Till Done has thought of 25 Ways to Make Oatmeal Cookies Even Better, and, although not all twenty-five are to my taste, that post has certainly whetted my appetite for an old-fashioned oatmeal cookie, maybe with a twist or two.

Looking for something a little richer and fancier than cookies? Try the Sour Cream Scones, as featured on Joy the Baker's blog. They look so fluffy and delicious--and after you're done drooling over those photos, scroll down for a fun list of Joy's other loves.

I've done a whole lot of baking, but I've never made a jelly roll. Well, the Lemon Berry Roulade at Pastry Studio has inspired me to try something new. It just looks so refreshing and delicious!

And finally, the savory... I think that everyone should know How to Boil an Egg, and Sydney of The Crepes of Wrath shows us this important skill. So if you're in need of a delicious, nutritious snack, take a break from baking and try some hard-boiled eggs--you won't regret it.

That's all for my sniffing around this time. Stay tuned to "Smells Like Dessert" for recipes, tips, tricks, amusements, and general oddities!

Monday, July 21, 2008

The Perfect Brownie. There, I Said It.


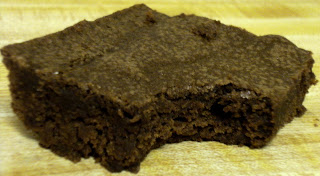
I apologize if the post title shocked or scandalized you, but I had to be bold, to make a statement: I have, in fact, found my perfect brownie. Now, I understand that people's ideas of the "perfect" anything, especially brownie, are different, so fear not... I will not try to impose my own personal brownie beliefs on you. But you might as well know where I stand. Most importantly, in the fudgy vs. cakey battle, I fight for the fudgy side, with the caveat that I do like my brownies to have a little structure. I see these ridiculously low amounts of flour--like 1/4 cup--in recipes, and I find myself wanting more than just a big pan of chocolate, butter, sugar, and eggs.

I have fond memories of childhood baking. One of the most fun moments in the kitchen was with my sister, making brownies from a cookbook we had just gotten called Kids Cooking: A Slightly Messy Manual by Klutz (as a side note, one of my friends swears by the chocolate chip cookie recipe in there, but we all know I have my favorite). She and I worked together, cooking up a storm, to make a pan of these brownies, and they were absolutely wonderful, garnering rave reviews from all who partook. And we never made them again because we lost the book.

For the next several years, I would make brownies and think of how they paled in comparison to the joyous chocolatey morsels that emerged from the oven that one evening many years ago. It was not until college that I decided to search on Google for two words, "brownies+Klutz," and, miraculously, I found the recipe and immediately (not kidding!) made brownies for my friends, who declared them the best brownies they had ever had. This is good stuff, people. And then, I went home and, equally miraculously, found the cookbook hiding behind other volumes! What joy, what rapture!

And so, readers, now that I have regaled you with a heartfelt childhood story, I urge you to try this brownie recipe (and it's one bowl, too!). If you wish, you may substitute 3 ounces unsweetened chocolate for the cocoa powder, but I'd try the original recipe first just to experience for yourself the enchanting brownies that have lived in my memories for years. Be sure to measure the flour lightly. This is different from the other recipes on this blog because, for this particular recipe, measure flour as follows: first, place the measuring cup on the counter and fluff up the flour with a regular spoon. Then, take a spoonful of flour and plop it into your measuring cup. Do not shake, tap, or otherwise disturb the measuring cup. Just keep going by taking another spoonful of flour and plopping it into the cup. Repeat until flour mounds over top of cup, and level off with knife. Trust me, if you just irreverently dip the measuring cup into the flour, take a big ol' scoop, and level, you'll have too much flour in the recipe, so please, for this recipe, follow the method. Do it for me. And for brownies, of course.

Okay, enough of this technical talk. Make these brownies and brace yourself because they are out of this world!

The Brownies Dreams Are Made Of
Makes 12 to 16 brownies.
Adapted from Kids Cooking.
2 cups granulated white sugar
3/4 cup cocoa powder
1 cup (2 sticks) butter, melted
4 eggs
1 teaspoon vanilla extract
150 grams (1 1/4 cups sifted) all-purpose flour
1/4 teaspoon salt

** Preheat oven to 350 degrees F. **

1. Grease an 8-inch (9-inch) square or 13- by 9-inch rectangular pan for thick or thin brownies, respectively.
2. In large mixing bowl, combine sugar and cocoa powder with whisk until homogeneous.
3. Add melted butter and whisk to combine.
4. Add eggs, all at once, and vanilla, and whisk vigorously until well incorporated.
5. Sprinkle flour and salt over wet ingredients and whisk. Finished batter should be smooth and satiny.
6. Pour into prepared pan and bake for 50 to 60 minutes (8x8 in.) or 20 to 25 minutes (13x9 in.), or until toothpick inserted in center comes out with moist crumbs.
7. Cool completely on wire rack before serving, if you can wait that long.

Saturday, July 19, 2008

Coffee? I'd Rather Have Cake!


I love baking cake; in fact, it might be one of my favorite treats to make. I was looking through my "Recipes to Test" file and saw that nearly all of them were cake recipes. That just goes to show where my tastes lie! But really, cake is very difficult to hate--there are so many flavors to choose from, and the (ideal) texture is just so lovely.

Enter the Sour Cream Coffee Cake from The Best of America's Test Kitchen 2008, of which I have posted a review. Would you believe that, before this experience, I had never used sour cream in baking? Ever? I know, it's shameful but true; I just never had occasion to. Well, this was as good a time as any to try my hand at baking with sour cream, and it really does add a lot to the texture of a cake, although I must say that non-sour-cream cakes can be just as nice.

So I have good news and bad news about this recipe. The good news is that the cake tastes delicious, and it is so light and fluffy. I cut the cake recipe in half and baked it in an 8x8-inch pan; the streusel topping I reduced to a quarter of the original recipe, and it was enough. Believe it or not, I do care just a bit about calories, and I thought it wise to reduce the streusel topping a little. Oh, and the finished topping? It was wonderful, with an excellent cinnamon flavor and a good crunch from the almonds I used.

Now the bad news. My "oh damn" moment... Due to the different pan size, I was unsure of baking time (I usually estimate correctly but was a bit off this time), and I tested the cake too early. Thus, I had the pleasure of watching the middle of the cake sink right before my eyes, as if I were deflating a balloon. Whoops. I'm going to blame that little blunder on the oven's less-than-well-behaved antics as of late. But the texture in the middle did not suffer terribly, so the consequences were mostly aesthetic. Even then, no one really noticed, so I didn't worry about it too much, and neither should you (if that happens)! Coffee cake, I have found, is quite a bit sturdier and therefore more forgiving than your standard, delicate, birthday-cake creation.

You may have noticed that, throughout this post, I have refrained from using the word... moist. I really hate it when people use that word because, in my opinion, that's what a cake should be. It is the normative, so to speak, and I think that saying a cake is moist or should be moist is a bit redundant. Besides, the term is overused. I prefer less tired words like velvety, silky, soft, and fluffy. And they all describe this cake, so make it! Right now! Here's the recipe!

Sour Cream Coffee Cake
Adapted from The Best of America's Test Kitchen 2008.
Makes two 8-inch square or 9-inch round cakes.

Streusel Topping:
1/3 cup packed light brown sugar
1/3 cup granulated white sugar
45 grams (1/3 cup) all-purpose flour
4 tablespoons butter, chilled and cut into 1/2-inch pieces
1 tablespoon ground cinnamon
1 cup pecans, almonds, or walnuts, chopped

Cake:
420 grams (3 cups) all-purpose flour
1 tablespoon baking powder
1 teaspoon baking soda
1 teaspoon ground cinnamon
1/2 teaspoon salt
1 3/4 cups sour cream [a 16-ounce tub should be just enough]
1 cup packed light brown sugar
1 cup granulated white sugar
3 eggs
7 tablespoons butter, melted and cooled slightly

** Preheat oven to 350 degrees F. **

1. Make Streusel: Combine sugars, flour, butter, and cinnamon in medium bowl, and rub with fingers until mixture is no longer powdery. Stir in nuts and set aside.
2. In large bowl, combine flour, baking powder, baking soda, cinnamon, and salt.
3. In medium bowl, whisk sour cream, sugars, eggs, and butter until thoroughly combine.
4. Gradually whisk sour cream mixture into dry ingredients until just blended.
5. Pour into greased pans and sprinkle topping evenly over batter.
6. Bake for 25 to 35 minutes, or until toothpick inserted in center comes out with moist crumbs attached.
7. Let cool in pan on wire rack at least 15 minutes before serving.

Monday, July 14, 2008

Blondies: The Other Brownies.


Okay, okay, I know what you're thinking: "Chris, please! I haven't even gotten rid of those cookies yet, and now another recipe?" Yes, another one. After all, it's hot this time of year, and I've got to use up the bag of Ghirardelli chocolate chips before the remaining morsels of goodness melt. I know that I could just eat the rest of the chocolate chips--a viable option, for sure--but perhaps a more generous method is in order.

Enter blondies. While eerily similar to chocolate chip cookies, they are so much more: thick, sweet, rich chunks upon which the taste buds may feast. This recipe is one of the easiest I've ever baked, especially since it only dirties one bowl and uses melted butter. And you know what that means... no electric mixer! Woohoo! Kudos to Deb of Smitten Kitchen for pointing her loyal readers to this blondie recipe.

Making these goodies may be easy as sin, but by the end result, you would never know because the resultant blondies are just wonderful. I will warn you, though: because, unlike brownies, there is no chocolate to cut the sweetness of these treats, you may need a chaser of water. But hey, dessert is supposed to be sweet, so who's complaining? Not I. Enjoy! Oh, and by the way, blondies tend to dry out very quickly on the oven, so make sure to watch them carefully (to the point of paranoia) and to remove them when there are moist crumbs clinging to a toothpick so that the texture inside is perfect.

Blondies
Adapted from How to Cook Everything.
Serves 9 to 16.

1/2 cup butter, melted
1 cup light or dark brown sugar
1 egg
2 teaspoons vanilla
140 grams (1 cup) all-purpose flour
1/4 teaspoon salt
1 cup chocolate chips

** Preheat oven to 350 degrees F. **

1. Grease (with butter, shortening, or spray) an 8x8 in. pan.
2. In large bowl, combine butter and sugar until smooth.
3. Stir in egg and vanilla and mix well.
4. Gently stir in flour and salt until just incorporated.
5. Add chocolate chips and mix until evenly distributed throughout batter.
6. Bake in preheated oven for 20 to 25 minutes, or until toothpick inserted in center comes out with moist crumbs attached.
7. Let cool completely on wire rack (if you can stand it) before cutting.

Thursday, July 10, 2008

The Quest Has Ended


Yes, ladies and gentlemen, I am jumping on the chocolate chip cookie bandwagon several months late. I, too, have been on the quest for the perfect chocolate chip cookie, and I have found it. Yet the perfect cookie never goes out of style; it is timeless and is wholly without bandwagon.

Now, in the cookie battle, I choose to plant myself squarely in the "chewy" camp--I like a cookie that is buttery, soft, and rich. I also don't like too many chocolate chips, just enough to dot the cookies with little morsels of goodness. This recipe, which some claim appeared in Cooks Illustrated and which others say has been a family favorite for years, definitely fits the bill. It is soft and gooey, even hours, nay, days out of the oven. The extra egg yolk, it is said, contributes to richness and chewiness without making the texture gummy (sometimes an unintended side effect of egg whites), and the melted, rather than softened and creamed, butter helps the cookies stay chewy for a while (yes, melting the butter is essential!).

I used Ghirardelli milk chocolate chips because I really like a nice sweet chocolate and thought that the milk chocolate chips would add to the overall richness of the cookie. And believe it or not, this brand is only zero to ten cents more expensive than Toll House morsels. Trust me, it's worth it; these cookies were absolutely delicious. Now, I'll warn you--the recipe makes a big cookie, but you cannot skimp. I'm as health conscious as anyone, but the consumption of chocolate chip cookies is not the time for calorie counting. Enjoy a nice big, fat, chewy cookie. If you must, have half, but please, please do not reduce the size of the cookie in the recipe. It makes a difference, y'know!

You won't believe the number of recipes I tried before I stumbled upon this one. But behold! Buttery goodness! And then, the recipe.

Best Buttery Chocolate Chip Cookies
Adapted from Allrecipes.
Makes 18 cookies.


280 grams (2 cups) all-purpose flour
1/2 teaspoon baking soda
1/2 teaspoon salt
1/2 cup granulated white sugar
1 cup light or dark brown sugar
3/4 cup butter, melted
1 egg
1 egg yolk
1 tablespoon vanilla extract
1-2 cups chocolate chips

** Preheat oven to 325 degrees F. **

1. In small bowl, combine flour, baking soda, and salt.
2. In large bowl, combine sugars. Add butter and stir with wooden spoon for a few seconds until well blended.
3. Stir in egg, egg yolk, and vanilla. Be sure that all ingredients are incorporated.
4. Add dry ingredients and stir until just combined.
5. Gently stir in chocolate chips.
6. Wrap dough in plastic wrap and chill for at least 20 minutes.
7. Drop dough by 1/4 cupfuls onto a greased baking sheet (9 cookies on the sheet, about half the dough).
8. Bake for 15 to 17 minutes, until the cookies are just beginning to brown around the edges--don't even let them set in the middle.
9. Cool on baking sheet for 5 minutes to allow cookies to firm up.
10. Place cookies on wire rack to cool, and repeat with remaining dough.
11. Store any leftovers (say what?) in an airtight container with a slice of bread to preserve chewiness.

Saturday, July 5, 2008

Celebrating Deliciously


Everyone always seems to have a lot of spirit on the Fourth of July--very colorful spirit. I knew, therefore, that I wanted to make an equally colorful dessert, but what would I use to achieve those colors? I had been itching to bake a cake, so I decided to satisfy that urge. Plus, cakes are easy to make colorful because there are many, many combinations of frosting, filling, cake layers, et cetera, to use.

I knew exactly how I would make the white portion of the cake: first, the layers themselves, and second, the frosting. Tucked away in my "Please Test These Recipes!" file was a recipe for Real Vanilla Bean Buttercream from Baking Bites, with a couple of modifications to compensate for my lack of vanilla-bean ownership. The cake itself is a yellow cake recipe that I originally found on Crisco's web site and since have made my own. I always joke that it's a butter cake without any actual butter, but it still tastes delicious, with quite a bit of moistness and fluffiness. If you're looking for a better-tasting version of a box mix, this is it--and you can make it by hand!!

As for the red, I opted for a nice strawberry sauce from Joy of Baking, and, to achieve the blue, I sprinkled some fresh blueberries on top.

The cake came out wonderfully; as you can see, it is nice and high, and, although the strawberry sauce kind of disappeared, there is a nice hint of red that completes the patriotism of the cake. I found that I couldn't mix the cake with a mixer due to the large amount of batter, so I had to do it by hand (it gets easier every time, I promise!). And the frosting... oh, the frosting... it looked like ricotta cheese for quite a while once I added the pound of butter, but I just kept beating and beating, and it came together like a thing of beauty. So have faith when you make this frosting; it will pay off!!

Yellow "Butter" Cake
Adapted from Crisco.
Makes one two-layer 9-inch cake.

300 grams (2 1/2 cups) sifted cake flour
1 2/3 cups sugar
3 1/2 teaspoons baking powder
1 teaspoon salt
1 1/4 cups milk, divided
2/3 cup shortening (e.g., Crisco; do not substitute butter)
3 eggs
2 teaspoons vanilla extract

**Preheat oven to 350 degrees F.**

1. In large bowl, sift together flour, sugar, baking powder, and salt.
2. Add 3/4 cup milk and all of shortening. Beat 300 strokes by hand or 2 minutes on medium speed of electric mixer.
3. Add remaining 1/2 cup milk, eggs, and vanilla. Beat 300 more strokes by hand or 2 more minutes on medium speed of electric mixer.
4. Divide batter evenly between pans, and bake for 30 to 40 minutes, or until cake tester comes out with moist crumbs.
5. Turn cakes out onto a wire rack to cool completely before frosting and filling.

Vanilla Buttercream Frosting
Adapted from Baking Bites.
Makes enough to fill and frost one 9-inch layer cake.

1 pound (2 cups or 4 sticks) unsalted butter, cut into tablespoon-sized chunks
1 cup sugar, divided
1/4 cup water
5 egg whites
1/4 teaspoon cream of tartar
2 teaspoons vanilla extract

1. Separate eggs while they are cold, and place whites in large mixer bowl. Save or discard yolks.
2. Combine 3/4 cup sugar and 1/4 cup water in small saucepan. Set aside.
3. Measure out 1/4 cup sugar and 1/4 teaspoon cream of tartar (in separate bowls) and place near egg whites.
4. Place saucepan over medium heat and bring to 230 degrees F (soft-thread stage) on candy thermometer.
5. While sugar continues to cook, beat egg whites; when they are frothy, reduce mixer speed to medium-low, and add cream of tartar. Slowly add 1/4 cup sugar.
6. When egg whites reach the soft-peak stage, remove boiling sugar syrup from heat and slowly stream it into egg-white mixture. Beat mixture until bowl is no longer warm to the touch, a few minutes.
7. Add butter, piece by piece, until all butter has been added.
8. Beat until mixture is smooth, about 10-20 minutes. Mixture will separate, look awful, curdle, shrivel, whine, frighten, or all of the above; just keep beating until it is smooth. It will come.
9. Store at room temperature.

Strawberry Sauce
Adapted from Joy of Baking.
Makes enough for a thin layer of filling; can be doubled.

10 ounces fresh or frozen (thawed, undrained) strawberries
2-4 tablespoons sugar

1. Puree strawberries in food processor.
2. Transfer to bowl or measuring cup; stir in sugar to taste. Serve immediately or refrigerate (or don't--it can stay on the cake at room temperature without dire consequences).